Dr. Vector, Maker of Worlds
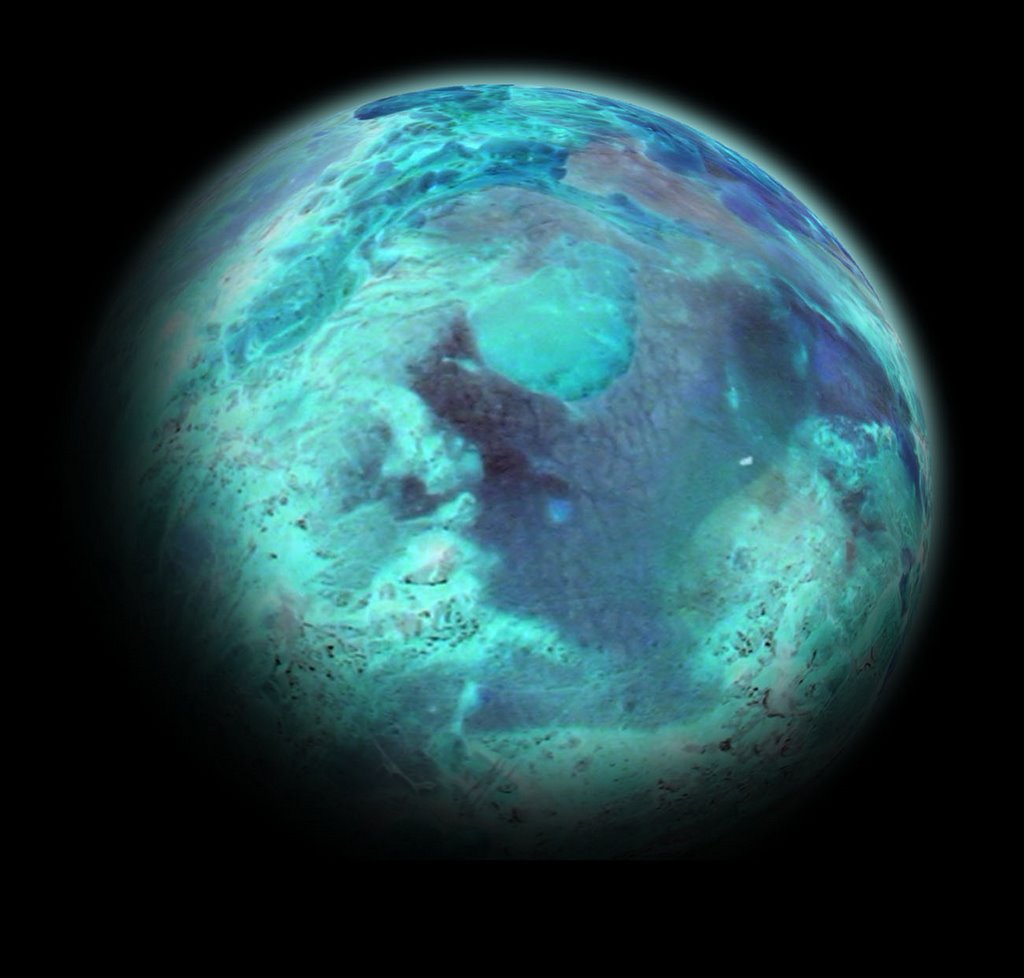
A few weeks ago I found this badass Photoshop tutorial on how to make planets (another similar tutorial is here). Using a shortened version of the programme outlined in the tutorial, I made the icy planet shown above, with its swirling clouds, ocean basins, and ice packs, in about 10 minutes. And I made it from a gory photo of a skinned emu. This post is a step-by-step explanation of how I did it.
Note: this post is NOT intended as a replacement for the tutorials linked above. I took a lot of shortcuts, so this is at best a sort of "planets for dummies". But really I just want to explain how I made this yucky thing (below) into that beautiful planet.
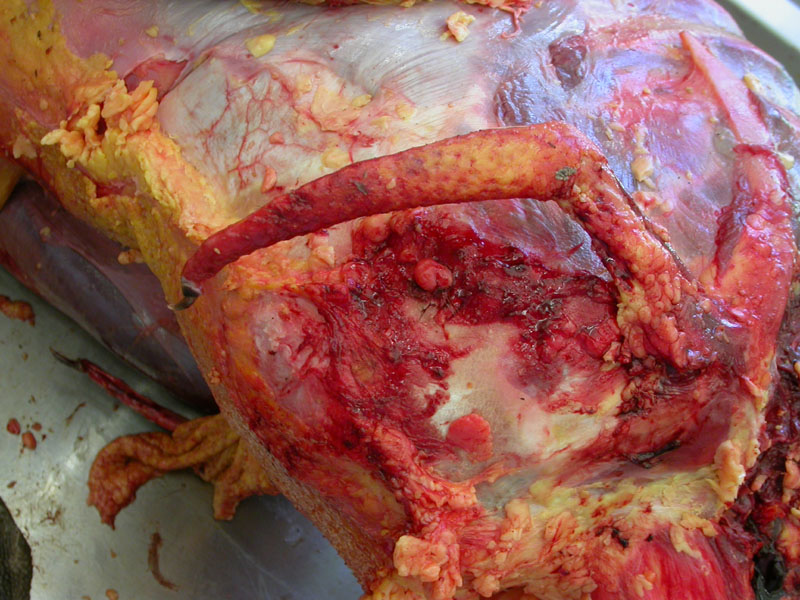 A couple of years ago I got to scrub in and assist on the dissection of an emu. Here is a photo of the skinned right wing (complete with claw) and chest. The neck is out of sight at the bottom of the image, and the sternum forms the contour of the chest on the left side of the picture. This was the 8th planet I attempted, so I had developed a little bit of an eye for interesting textures.
 Oh, I did all of this in Photoshop 5.5, which is pretty outdated but still good enough for everything I need to do. You should be able to do the same operations in other programs, and in fact there are several ways to do most of these things even in Photoshop. The first step is to use the circular marquee tool to select the region that is going to become your planet. In this case, I chose the ventrolateral wall of the chest, just forward of and below the wing. Copy that, paste it into a new layer, crop the background, and set it to black.
 The step that makes a circular selection into a planet: spherize, and then spherize again (under Filters). Now I've got Planet Carcass. Yuck.
 But by inverting the colors, I instantly got the planet. What is that, like 10 steps? Marquee, copy, paste, select background, clear to black, crop, spherize, spherize again, invert. That's it. Nine steps, and I've got a pretty good looking planet. If you want an evenly-lit, no-atmosphere-having rock, you're done.
 There are lots of ways to get an atmosphere. My way is fast and easy, but it is admittedly not as sophisticated as the method outlined in the tutorial, nor does it yield the same results. But for my purposes, it's good enough.
The first step is to duplicate the planet layer, and move the new layer, named "Atmosphere", under the planet. I used the Numeric Transform to blow it up to 102%. Then I dropped the contrast and upped the brightness to get a white circle. That's what you see here: the planet sitting on top of a slightly-larger white circle.
 Then you fill the white circle with whatever color you want your atmosphere to be (if the atmosphere isn't at least close to the dominant color of the planet, it looks pretty weird). The final step is to apply a Gaussian blur (another filter). You can fiddle with the specifications of the blur to get the atmosphere to stand out farther from the planet or pull it in tighter. I like a tighter atmosphere, because a big atmosphere glow (a) makes the planet look small, and (2) IMHO looks fake.
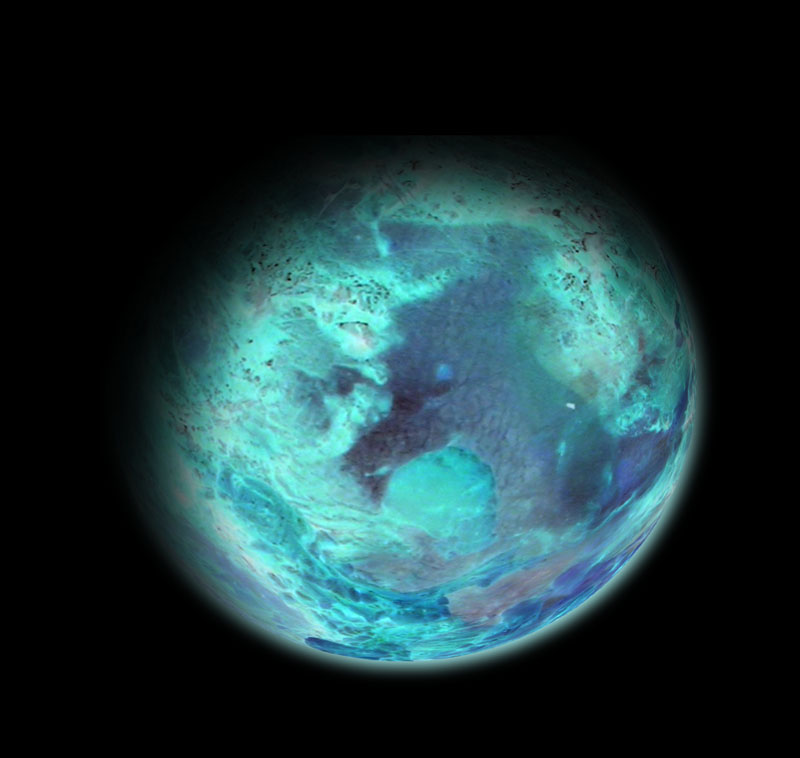 The final step is the shadow. Again, there are about a zillion ways to do this. Here's how I got mine. I made another layer on top of the planet and atmosphere layers and filled it with black. Then I created a huge-ass brush with very soft edges (low hardness) and just punched a planet-sized hole in the black layer. Then I dragged the shadow layer off center. This is kind of a fun step--you can drag the shadow around and decide which limb of your planet looks best. I liked the blue ocean area at the bottom of my planet, so I dragged the hole in that direction. But we're used to seeing things lit from above, so I flipped the picture over to make the final version shown at the beginning of the post.
That's it. Go make your own!
Labels: Fotoshop Phun, Just Plain Cool, Let Me Walk You Through It, Rockets and Space Stuff
posted by Dr. Vector at 11:57 PM
![]()
![]()

0 Comments:
Post a Comment
<< Home